This page has been depreciated. Blueprints should have most of the information you're looking for in a nicer format.
This is a list of every Work Station that can be constructed in the game. For more in depth articles on each region check the location page for each.
Sweet Home[ | ]
Cooking Table[ | ]
| Icon | Description | Ingredients | Recipe Source |
|---|---|---|---|

|
General food preparation station. | Cannot be built |
Unlike the oven, the cooking table does not produce any edible food, and uses energy to make food components
| Item Produced | Materials Required | Energy | Notes |
|---|---|---|---|
| 4x Flour | 4x Wheat | 8 |
|
| 4x Dough | 2x Flour
3x Water |
4 |
|
| 4x Pastry Dough | 2x Flour
4x Water 1x Chicken Egg |
6 |
|
| Package of Meat | 1x Flesh
1x Clean Paper 1x Stamp |
5 |
Stamp is not consumed, Recipe obtained by talking to Horadric once you have obtained a Stamp |
| Raw Sliced Meat | 1x Package of Meat | 1 |
|
| Raw Sliced Meat | 3x Frogs | 5 |
|
| Raw Sliced Meat | 1x Flesh | 5 |
|
| Berry Juice | 3x Red Apple,
6x Berry |
10 |
Note: also prepares fish (very long list)
Oven[ | ]
| Icon | Description | Ingredients | Recipe Source |
|---|---|---|---|

|
General cooking station. | Cannot be built |
Oven production does not require energy, it uses Fuel produced by first two recipes
Time is the real world time, in seconds, the item takes to be produced by the Oven
Some items are craftable at multiple quality levels, Bronze, Silver or Gold Star, which yield different energy when eaten
Fuel
| Item Produced | Materials Required | Fuel +/- |
|---|---|---|
| 5x Fuel from Sticks | 10x Wooden Stick | +5 |
| 5x Fuel from Firewood | 1x Firewood | +5 |
Snacks
| Item Produced | Materials Required | Fuel +/- | Time | Energy | Notes |
|---|---|---|---|---|---|
| Fried Egg | 1x Chicken Egg | -1 |
8 | +11 |
|
| 2x Bread | 2x Dough | -4 |
60 | +12 |
|
| 3x Onion Rings | 1x Seed Oil
1x Onion |
-2 |
12 | Multiple Qualities | |
| 5x Baked Apple | 5x Red Apple | -2 |
30 | +6 |
|
| 3x A Bowl of Sauerkraut | 3x Cabbage
2x Carrot 1x Salt |
-6 |
30 | +25 |
|
| 3x Baked Mushrooms | 6x Edible Mushroom | -3 |
25 | +10 |
|
| 5x Pancakes | 1x Pastry Dough
1x Jug of Milk 1x Butter |
-10 |
45 | +33 |
|
| 3x Sandwich | 2x Bread
1x Baked Meat 1x Cabbage |
-9 |
25 | +17 |
|
| 3x Toasts with Onions | 1x Dough
1x Onions |
-5 |
45 | Multiple Qualities |
Meals
| Item Produced | Materials Required | Fuel +/- | Time | Energy | Notes |
|---|---|---|---|---|---|
| 3x Omelette | 3x Chicken Egg
1x Jug of Milk |
-5 |
12 | +20 |
|
| Fish Nuggets | 1x White Fish Fillet
2x Seed Oil |
-5 |
26 | +25 |
|
| 4x Carrot Cutlet | 2x Carrot
1x Salt |
-10 |
35 | +12 |
|
| 2x A Bowl of Lentils | 1x Water
1x Lentil |
-10 |
35 | Multiple Qualities | |
| 4x A Bowl of Pumpkin Soup | 1x Jug of Milk
2x Pumpkin |
-10 |
40 | Multiple Qualities | |
| 2x Baked FIsh | 2x White Fish Fillet | -6 |
25 | +15 |
|
| 3x Baked Salmon | 1x Cabbage
1x Red Fish Fillet |
-5 |
65 | Multiple Qualities | |
| 4x Fish Soup | 4x White Fish Fillet
2x Carrot 5x Water |
-12 |
120 | +20 |
|
| 6x Baked Kebab | 1x Red/Blue Fish Fillet
2x Pumpkin |
-25 |
45 | Multiple Qualities | |
| 6x Baked Kebab | 1x Red/Blue Fish Fillet
2x Onion |
-20 |
55 | Multiple Qualities | |
| 6x Baked Kebab | 1x Red/Blue Fish Fillet
5x Edible Mushroom |
-20 |
70 | Multiple Qualities | |
| 2x Baked Meat | 1x Raw Slice Meat | -10 |
35 | +15 |
|
| 3x Baked Pumpkin | 1x Pumpkin | -10 |
40 | Multiple Qualities | |
| 4x Burger | 2x Bread
4x Baked Meat 1x Onion |
-5 |
15 | Multiple Qualities | |
| 3x Lasagna | 1x Dough
1x Lentil 1x Cabbage |
-15 |
45 | Multiple Qualities | |
| 3x Pasta | 3x Dough
1x Cheese |
-45 |
100 | +50 |
|
| 4x Cabbage Soup | 2x Cabbage
1x Beet 1x Onion |
-45 |
90 | Multiple Qualities | |
| 4x Pumpkin Soup | 1x Beet
2x Carrot 2x Pumpkin |
-45 |
100 | Multiple Qualities | |
| 4x Vegetable Soup | 2x Cabbage
2x Carrot 2x Pumpkin |
-30 |
120 | Multiple Qualities |
Baked Goods
| Item Produced | Materials Required | Fuel +/- | Time | Energy | Notes |
|---|---|---|---|---|---|
| 4x Green Jelly | 4x Green Slime
1x Honey |
-5 |
25 | +25 |
|
| 4x Red Jelly | 4x Green Slime
1x Berry Juice |
-14 |
30 | +30 |
|
| 4x Muffin | 1x Dough
1x Honey |
-20 |
30 | +20 |
|
| 4x Croissant | 1x Dough
1x Honey 1x Chicken Egg |
-25 |
45 | +25 |
|
| Cake | 1x Pastry Dough
1x Honey 5x Berry |
-15 |
45 | +95 |
|
| 2x Berry Pie | 1x Pastry Dough
1x Berry Juice |
-15 |
45 | +35 |
|
| 2x Grape Pie | 1x Pastry Dough
1x Grapes |
-15 |
45 | Multiple Qualities |
| Work Stations | |
|---|---|
| File:Work Stations.png | |
Location information
| |
Buildable
|
True |
Exits
|
Apiary, Sweet Home, Garden, Morgue, Graveyard |
The Workyard is the area directly south of your home and is where you'll build most of the building and smithing workstations using the blueprint desk. The Workyard can quickly get a bit crowded without the increased yard space, so its a good idea to place workstations carefully.
Your starting Workyard has a 6x9 area containing a timber stockpile and a stone stockpile, a 11x6 area, and a third area shaped like a 15x9 area with a 6x5 area in the bottom left corner missing. The swampy area to the north of the Workyard will have several green slimes at day time (they despawn at noon) and several bats at night (they despawn at midnight).
Work stations[ | ]
The workbench for placing all the workstations is located in the northwest corner of the Workyard. For most stations, you first have to unlock the related technology.


| |||||
| Morgue | |
|---|---|
| |
Location information
| |
Buildable
|
True |
Exits
|
Alchemy Lab, Workyard, Souls room |
Npcs
| |
| Gerry | |
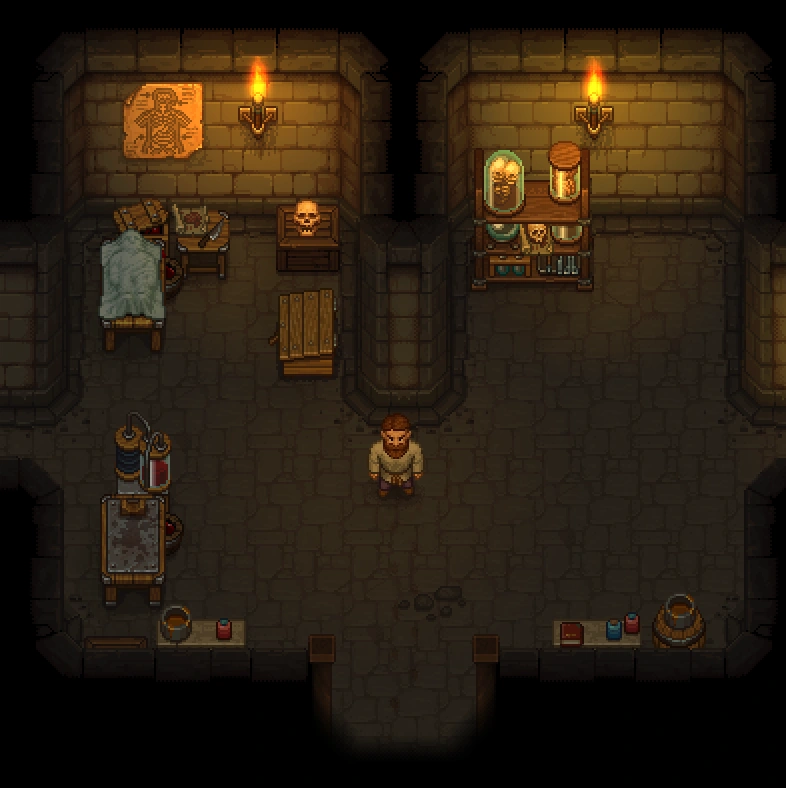
The morgue is one of the first important areas you see in the game. You process bodies here. Regardless of whether you toss corpses in the river, burn them, or bury them in a grave, it is recommended that you process their body in the morgue first. The morgue is where you can find Gerry. It's also here, where you can create and alter zombies to take over parts of your tiresome workload.
Deliveries and Capacity[ | ]
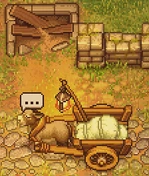

The  donkey delivers a
 ![]() corpse daily as long as the number of bodies you have unfinished does not exceed the capacity
corpse daily as long as the number of bodies you have unfinished does not exceed the capacity ![]() . It is dropped on the road in front of the morgue. After reopening the church, you'll have to put 5×
. It is dropped on the road in front of the morgue. After reopening the church, you'll have to put 5×
carrot per ![]() corpse into the donkey's box (must be built first) to "pay" for the deliveries.
corpse into the donkey's box (must be built first) to "pay" for the deliveries.
Bodies count against this capacity ![]() even when outside the morgue. Once a body is buried, cremated, or tossed in the river, it does no longer count against
even when outside the morgue. Once a body is buried, cremated, or tossed in the river, it does no longer count against ![]() . Once made into a
. Once made into a ![]() zombie on a resurrection table, the body also doesn't count any more, even when it occupies a work station.
zombie on a resurrection table, the body also doesn't count any more, even when it occupies a work station.
Corpses inside the morgue will decay slower than corpses outside. A corpse on a pallet will decay slower than those left on the floor. See corpses for more information.
Corpse Hatch[ | ]

The corpse hatch allows corpses to be dropped directly into the morgue where they will decay slower. The benefit of repairing the hatch is slight so it is often not worth it to repair until later.
| Icon | Materials Required | Energy | Notes |
|---|---|---|---|
 Fix corpse hatch Fix corpse hatch
|
2× A piece of stone |
Repair must be done twice. Both inside the morgue and outside. |

After fixing the hatch, the donkey delivers the corpse directly into the morgue. It will appear directly in front of the hatch. Unfortunately, there is no means to store it automatically onto a pallet to halt its decay completely. At least, the decay is slowed down that way.
Workbench[ | ]
The workbench, called "mortuary desk", has to be repaired first, before using it. After learning the appropriate techniques, you can put up a lot of different workstations here:
| Blueprint | Required Materials | Size | Notes |
|---|---|---|---|
 Repair mortuary desk Repair mortuary desk
|
2× Flitch 2× Simple iron parts |
This must be done first. | |
 Preparation place Preparation place
|
12× Flitch 4× Complex iron parts 8× Nails |
5x4 | Requires First slice Adds 1 |
 Preparation place II Preparation place II
|
6× Wooden plank 4× Steel parts 6× Nails |
5x4 | Requires Anatomy II Adds 1 |
 Embalming table Embalming table
|
8× Wooden plank 4× Complex iron parts 6× Nails |
4x4 | Requires Embalming Adds 1 |
 Embalming table II Embalming table II
|
10× Wooden plank 4× Steel parts 4× Advanced conical flasks |
4x4 | Requires Embalming II Adds 1 |
 Pallet Pallet
|
6× Flitch 4× Nails |
4x3
(rotatable) |
Requires First slice Adds 1 |
 Double pallet Double pallet
|
12× Flitch 10× Nails |
4x3
(rotatable) |
Requires Anatomy II Adds 2 |
 Fridge pallet Fridge pallet
|
12× Flitch 12× Nails 5× Complex iron parts |
4x3
(rotatable) |
Requires Embalming II Adds 2 |
 Mortuary rack Mortuary rack
|
8× Flitch 6× Nails 2× Wooden beam |
4x2 | Requires Embalming Decorative storage for 25 items. |
 Resurrection table Resurrection table
|
4× Wooden plank 4× Complex iron parts |
5x4 | Requires Second chance Produce zombies here. |
Autopsies[ | ]

(Possible Bug Warning: Corpses that spawned in the graveyard at the start of game may not acknowledge organs or parts put into them, effectively 'eating' the parts with no benefit. Parts can still be removed as normal. If you exhume a corpse with 100% freshness from the right/east side of the graveyard, be wary of trying to improve it via autopsy)
Use the preparation place to remove or insert body parts from corpses or zombies. Each organ has a different effect on ![]() and
and ![]() of a body and are required for crafting ingredients and completing quests. Corpse rating impacts
of a body and are required for crafting ingredients and completing quests. Corpse rating impacts ![]() . For each
. For each ![]() a corpse has, its
a corpse has, its ![]() will be reduced by one and a grave's max rating is limited by the number of
will be reduced by one and a grave's max rating is limited by the number of ![]() a corpse has. A grave cannot have a higher
a corpse has. A grave cannot have a higher ![]() than the number of
than the number of ![]() of a buried corpse. For the full article on how corpse rating works, see corpses. Here is a table of each part that can be removed/inserted and its effects as shown by the cultist perk:
of a buried corpse. For the full article on how corpse rating works, see corpses. Here is a table of each part that can be removed/inserted and its effects as shown by the cultist perk:
| Preparation place Preparation place II | |||
|---|---|---|---|
| Body Part | Effect on corpse ratings upon removal | Technology | |
| Flesh |
- |
No effect | First Slice |
| Blood |
+ |
- |
Softspares |
| Fat |
+ |
- |
Softspares |
| Bone |
No effect | No effect | Hardspares |
| Skin |
- |
+ |
Hardspares |
| Skull |
No effect | + |
Hardspares |
| Brain |
Randomly between
+ |
Randomly between
+ |
Important Parts |
| Heart |
Important Parts | ||
| Intestine |
Important Parts | ||
| Dark brain |
- |
- |
Dark Bodies |
| Dark heart |
- |
- |
Dark Bodies |
| Dark intestine |
- |
- |
Dark Bodies |
| - |
+ |
None | |
The number of skulls on a corpse is a combination of the number of the skulls on all its parts, as can be seen once Inquisitor's quest line advances far enough and the cultist perk is taken.
All skull variation comes from the Important Parts, Brain, Heart and Intestine. However the generation of those is not as simple as the table makes it out to be. And in fact varies based on the stage of the game. For example, during the Inquisitor's questline you will start finding +![]()
![]()
![]()
![]() , +
, +![]() important parts which would be dark important parts when his quest line is progressed further.
important parts which would be dark important parts when his quest line is progressed further.
Once you have a good preparation table and the surgeon perk it should be possible to start cherry-picking important parts, either by remembering their effects and sorting them into separate storages, or, preferably, by utilising the cultist perk.
You can noticeably unburden your embalming efforts by collecting the better parts and making "frankencorpses" with them. A corpse with best possible variable parts in all 3 slots and both Blood and Fat removed will be only 1 ![]() away from 12. Though considering that best parts are rare it is probably best to compromise.
away from 12. Though considering that best parts are rare it is probably best to compromise.
Also since zombies ignore all ![]() , it's a good idea to keep parts with both skull counts high for use on zombies.
, it's a good idea to keep parts with both skull counts high for use on zombies.
There is one exception to the regular corpse rules. The body of an ex-graveyard keeper found after excavating the archeology machine in the Talking Skull Cellar has two brains, and no blood or fat.
Embalming[ | ]

A corpse or zombie can be placed on the table and injected with embalming fluid to change its properties. A body may only be injected with each kind of liquid once.
| Embalming table Embalming table II | ||
|---|---|---|
| Name | Effects | Technology |
| Lye injection |
+ |
Embalming Liquids |
| Acid injection |
- |
Embalming Liquids |
| Glue injection |
+ |
Embalming Liquids II |
| Preservative injection |
Halts body decay | Embalming Liquids II |
| Restore injection |
Reduces body decay by 50 % | Embalming Liquids II |
| Dark injection |
+ |
Embalming Liquids III |
| Silver injection |
- |
Embalming Liquids III |
| Gold injection |
- |
Embalming Liquids III |
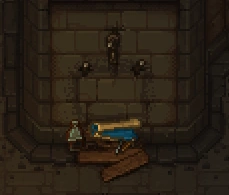
Resurrection[ | ]
A ![]() corpse can be placed on the Resurrection table to make a
corpse can be placed on the Resurrection table to make a ![]() zombie from it. You need first to talk to Gunter in order to be able to build the table. To revive one, you'll need 10×
zombie from it. You need first to talk to Gunter in order to be able to build the table. To revive one, you'll need 10×
faith, 1×
zombie juice, and - of course - the ![]() corpse.
corpse.
| |||||
| Morgue | |
|---|---|
|
| |
Location information
| |
Buildable
|
True |
Exits
|
Alchemy Lab, Workyard, Souls room |
Npcs
| |
| Gerry | |
The morgue is one of the first important areas you see in the game. You process bodies here. Regardless of whether you toss corpses in the river, burn them, or bury them in a grave, it is recommended that you process their body in the morgue first. The morgue is where you can find Gerry. It's also here, where you can create and alter zombies to take over parts of your tiresome workload.
Deliveries and Capacity[ | ]
The donkey delivers a ![]() corpse daily as long as the number of bodies you have unfinished does not exceed the capacity
corpse daily as long as the number of bodies you have unfinished does not exceed the capacity ![]() . It is dropped on the road in front of the morgue. After reopening the church, you'll have to put 5×
. It is dropped on the road in front of the morgue. After reopening the church, you'll have to put 5×
carrot per ![]() corpse into the donkey's box (must be built first) to "pay" for the deliveries.
corpse into the donkey's box (must be built first) to "pay" for the deliveries.
Bodies count against this capacity ![]() even when outside the morgue. Once a body is buried, cremated, or tossed in the river, it does no longer count against
even when outside the morgue. Once a body is buried, cremated, or tossed in the river, it does no longer count against ![]() . Once made into a
. Once made into a ![]() zombie on a resurrection table, the body also doesn't count any more, even when it occupies a work station.
zombie on a resurrection table, the body also doesn't count any more, even when it occupies a work station.
Corpses inside the morgue will decay slower than corpses outside. A corpse on a pallet will decay slower than those left on the floor. See corpses for more information.
Corpse Hatch[ | ]
The corpse hatch allows corpses to be dropped directly into the morgue where they will decay slower. The benefit of repairing the hatch is slight so it is often not worth it to repair until later.
| Icon | Materials Required | Energy | Notes |
|---|---|---|---|
| Fix corpse hatch
|
2× A piece of stone |
Repair must be done twice. Both inside the morgue and outside. |
After fixing the hatch, the donkey delivers the corpse directly into the morgue. It will appear directly in front of the hatch. Unfortunately, there is no means to store it automatically onto a pallet to halt its decay completely. At least, the decay is slowed down that way.
Workbench[ | ]
The workbench, called "mortuary desk", has to be repaired first, before using it. After learning the appropriate techniques, you can put up a lot of different workstations here:
| Blueprint | Required Materials | Size | Notes |
|---|---|---|---|
| Repair mortuary desk
|
2× Flitch 2× Simple iron parts |
This must be done first. | |
| Preparation place
|
12× Flitch 4× Complex iron parts 8× Nails |
5x4 | Requires First slice Adds 1 |
| Preparation place II
|
6× Wooden plank 4× Steel parts 6× Nails |
5x4 | Requires Anatomy II Adds 1 |
| Embalming table
|
8× Wooden plank 4× Complex iron parts 6× Nails |
4x4 | Requires Embalming Adds 1 |
| Embalming table II
|
10× Wooden plank 4× Steel parts 4× Advanced conical flasks |
4x4 | Requires Embalming II Adds 1 |
| Pallet
|
6× Flitch 4× Nails |
4x3
(rotatable) |
Requires First slice Adds 1 |
| Double pallet
|
12× Flitch 10× Nails |
4x3
(rotatable) |
Requires Anatomy II Adds 2 |
| Fridge pallet
|
12× Flitch 12× Nails 5× Complex iron parts |
4x3
(rotatable) |
Requires Embalming II Adds 2 |
| Mortuary rack
|
8× Flitch 6× Nails 2× Wooden beam |
4x2 | Requires Embalming Decorative storage for 25 items. |
| Resurrection table
|
4× Wooden plank 4× Complex iron parts |
5x4 | Requires Second chance Produce zombies here. |
Autopsies[ | ]
(Possible Bug Warning: Corpses that spawned in the graveyard at the start of game may not acknowledge organs or parts put into them, effectively 'eating' the parts with no benefit. Parts can still be removed as normal. If you exhume a corpse with 100% freshness from the right/east side of the graveyard, be wary of trying to improve it via autopsy)
Use the preparation place to remove or insert body parts from corpses or zombies. Each organ has a different effect on ![]() and
and ![]() of a body and are required for crafting ingredients and completing quests. Corpse rating impacts
of a body and are required for crafting ingredients and completing quests. Corpse rating impacts ![]() . For each
. For each ![]() a corpse has, its
a corpse has, its ![]() will be reduced by one and a grave's max rating is limited by the number of
will be reduced by one and a grave's max rating is limited by the number of ![]() a corpse has. A grave cannot have a higher
a corpse has. A grave cannot have a higher ![]() than the number of
than the number of ![]() of a buried corpse. For the full article on how corpse rating works, see corpses. Here is a table of each part that can be removed/inserted and its effects as shown by the cultist perk:
of a buried corpse. For the full article on how corpse rating works, see corpses. Here is a table of each part that can be removed/inserted and its effects as shown by the cultist perk:
| Preparation place Preparation place II | |||
|---|---|---|---|
| Body Part | Effect on corpse ratings upon removal | Technology | |
| Flesh |
- |
No effect | First Slice |
| Blood |
+ |
- |
Softspares |
| Fat |
+ |
- |
Softspares |
| Bone |
No effect | No effect | Hardspares |
| Skin |
- |
+ |
Hardspares |
| Skull |
No effect | + |
Hardspares |
| Brain |
Randomly between
+ |
Randomly between
+ |
Important Parts |
| Heart |
Important Parts | ||
| Intestine |
Important Parts | ||
| Dark brain |
- |
- |
Dark Bodies |
| Dark heart |
- |
- |
Dark Bodies |
| Dark intestine |
- |
- |
Dark Bodies |
| - |
+ |
None | |
The number of skulls on a corpse is a combination of the number of the skulls on all its parts, as can be seen once Inquisitor's quest line advances far enough and the cultist perk is taken.
All skull variation comes from the Important Parts, Brain, Heart and Intestine. However the generation of those is not as simple as the table makes it out to be. And in fact varies based on the stage of the game. For example, during the Inquisitor's questline you will start finding +![]()
![]()
![]()
![]() , +
, +![]() important parts which would be dark important parts when his quest line is progressed further.
important parts which would be dark important parts when his quest line is progressed further.
Once you have a good preparation table and the surgeon perk it should be possible to start cherry-picking important parts, either by remembering their effects and sorting them into separate storages, or, preferably, by utilising the cultist perk.
You can noticeably unburden your embalming efforts by collecting the better parts and making "frankencorpses" with them. A corpse with best possible variable parts in all 3 slots and both Blood and Fat removed will be only 1 ![]() away from 12. Though considering that best parts are rare it is probably best to compromise.
away from 12. Though considering that best parts are rare it is probably best to compromise.
Also since zombies ignore all ![]() , it's a good idea to keep parts with both skull counts high for use on zombies.
, it's a good idea to keep parts with both skull counts high for use on zombies.
There is one exception to the regular corpse rules. The body of an ex-graveyard keeper found after excavating the archeology machine in the Talking Skull Cellar has two brains, and no blood or fat.
Embalming[ | ]
A corpse or zombie can be placed on the table and injected with embalming fluid to change its properties. A body may only be injected with each kind of liquid once.
| Embalming table Embalming table II | ||
|---|---|---|
| Name | Effects | Technology |
| Lye injection |
+ |
Embalming Liquids |
| Acid injection |
- |
Embalming Liquids |
| Glue injection |
+ |
Embalming Liquids II |
| Preservative injection |
Halts body decay | Embalming Liquids II |
| Restore injection |
Reduces body decay by 50 % | Embalming Liquids II |
| Dark injection |
+ |
Embalming Liquids III |
| Silver injection |
- |
Embalming Liquids III |
| Gold injection |
- |
Embalming Liquids III |
Resurrection[ | ]
A ![]() corpse can be placed on the Resurrection table to make a
corpse can be placed on the Resurrection table to make a ![]() zombie from it. You need first to talk to Gunter in order to be able to build the table. To revive one, you'll need 10×
zombie from it. You need first to talk to Gunter in order to be able to build the table. To revive one, you'll need 10×
faith, 1×
zombie juice, and - of course - the ![]() corpse.
corpse.
| |||||
Alchemy Laboratory (church basement)[ | ]
Trunk[ | ]
Used as general storage items inside of a trunk will be accessible from any crafting station in the same region.
| Icon | Description | Ingredients | Recipe Source |
|---|---|---|---|
| General storage chest for up to 15 items. | 8× Flitch |
Improvement |
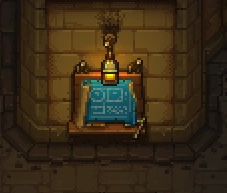
Study Table[ | ]
The Alchemy Laboratory starts out with a study table already installed. Most items in the game can be studied for a large number of red, green, or blue tech points and items cannot be studied more than once. The study table requires both faith and science to operate. Faith can be obtained by holding a sermon at the church or from confessionals, and science can be obtained from using paper, notes, or chapters in the study table.
After studying an object it might say it is decomposable into a fluid, powder, or extract. This refers to the alchemy apparatus that needs to be used to process it.
| Icon | Description | Ingredients | Recipe Source |
|---|---|---|---|
| Used to study the world around you. | 6× Wooden plank |
Research |
Alchemy Workbench (Tier I)[ | ]
Version 0.675 onward: Can be constructed. Glass Blowing II tech available which unlocks Complex Glass Cones
| Icon | Description | Ingredients | Recipe Source |
|---|---|---|---|

|
Unknown | 6x Planks
3x Complex Iron Parts 2x Complex Glass Cones |
The Beginning of Alchemy |
Alchemy Workbench (Tier II)[ | ]
Version 0.675 onward: Can be constructed. Glass Blowing II tech available which unlocks Complex Glass Cones
| Icon | Description | Ingredients | Recipe Source |
|---|---|---|---|
| Unknown | 6x Jointing
2x Steel Parts 3x Complex Glass Cones |
Advanced Alchemy |
Hand Mixer[ | ]
Decomposes suitable materials into solutions for use in Alchemy. To be used with the hand mixer a material must first be studied at the study table and have a fluid as a decomposition product.
| Icon | Description | Ingredients | Recipe Source |
|---|---|---|---|
| Used to mix things into solutions. | 6x Wooden Planks
4x Simple Iron Parts 8x Nails |
The Beginning of Alchemy |
| Item | Energy | Result |
|---|---|---|
| Cabbage | 5 |
Health Solution |
| Brain | 5 |
Health Solution |
| Carrot | 5 |
Health Solution |
| Yellow Flower | 5 |
Life Solution |
| Maggot | 5 |
Life Solution |
| Honey | 5 |
Acceleration Solution |
| White Flower | 5 |
Order Solution |
| Bee | 5 |
Order Solution |
| Green Slime | 5 |
Order Solution |
| Red Mushroom | 5 |
Toxic Solution |
| Fat | 5 |
Slowness Solution |
| Bees Wax | 5 |
Slowness Solution |
| Bat Wings | 5 |
Chaos Solution |
| Moth | 5 |
Chaos Solution |
Alchemy Mill[ | ]
Decomposes suitable materials into powders for use in Alchemy. To be used with the Alchemy Mill a material must first be studied at the study table and have a powder as a decomposition product.
| Icon | Description | Ingredients | Recipe Source |
|---|---|---|---|
| Used to grind things into powders. | 2x Polished Stone Bricks
6x Wooden Planks 4x Simple Iron Parts |
The Beginning of Alchemy |
| Item | Energy | Result |
|---|---|---|
| Cabbage | 5 |
Health Powder |
| Pumpkin | 5 |
Health Powder |
| Crop Waste | 5 |
Health Powder |
| Hemp | 5 |
Acceleration Powder |
| Honey | 5 |
Acceleration Powder |
| Bee | 5 |
Order Powder |
| Red Flower | 5 |
Toxic Powder |
| Onion | 5 |
Toxic Powder |
| Bat Wings | 5 |
Chaos Powder |
| Butterfly | 5 |
Chaos Powder |
| Intestine | 5 |
Yellow Powder |
| Graphite | 5 |
Graphite Powder |
| Bone | 5 |
White Powder |
Distillation Cube[ | ]
Decomposes suitable materials into extracts for use in Alchemy. To be used with the Distillation Cube a material must first be studied at the study table and have an Extract as a decomposition product.
| Icon | Description | Ingredients | Recipe Source |
|---|---|---|---|
| Distills the extracts of things. | 20x Pieces of Stone
8x Complex Iron Parts |
Advanced Alchemy |
Products:
| Item | Result |
|---|---|
| Lentils | Health Extract |
| Yellow Flower | Life Extract |
| Maggot | Life Extract |
| White Flower | Order Extract |
| Green Slime | Order Extract |
| Onion | Toxic Extract |
| Bees Wax | Slowness Extract |
| Moth | Chaos Extract |
| Butterfly | Chaos Extract |
Church Workbench[ | ]
Buildable in the Alchemy Lab below the Old Church, Costs 9 Flitch, 10 Nails, 4 Complex Iron Parts
| Icon | Description | Ingredients | Recipe Source |
|---|---|---|---|
| Used to make various church related products like ink, paper, candles and incense. | 9x Flitch 10x Nails 4x Complex Iron Parts |
Paper Crafting |
| Item Produced | Materials Required | Energy | Notes |
|---|---|---|---|
| Boost Fertilizer I | 1x Peat 1x Energy Elixer |
7 |
Fertilizers and their requirements are mixed up, bugged. |
| Boost Fertilizer II | 2x Peat 2x Energy Elixer |
15 |
Fertilizers and their requirements are mixed up, bugged. |
| Quality Fertilizer I | 1x Peat 1x growth enhancer |
7 |
Fertilizers and their requirements are mixed up, bugged. |
| Quality Fertilizer II | 2x Peat 2x flavor enhancer |
15 |
Fertilizers and their requirements are mixed up, bugged. |
| 5x Ink | 1x Glass cone 1x Water 1x Black paint |
5 |
|
| Pen and Ink | 3x Pen 3x Ink |
5 |
Pen, ink can be bought from astrologer |
| 4x Pigskin paper | 1x Skin | 5 |
|
| 4x Pigskin paper | 1x Pig skin | 5 |
Pig skin not obtainable |
| 4x Clean paper | 1x Pigskin paper | 5 |
|
| Softcover | 2x Pigskin paper | 10 |
|
| Hard cover (copper) | 1x Soft cover 1x Tanning agent |
10 |
Tanning agent not obtainable |
| Hard cover (silver) | 1x Hard cover (copper) 2x Silver Jewelry Details |
20 |
|
| Hard cover (gold) | 1x Hard cover (copper) 2x Gold Jewelry Details |
20 |
|
| Hemp Rope | 1x Hemp (copper) | 5 |
No quality level selection despite quality level items. Takes any hemp quality. |
| Candle 1 | 2x Fat 2x Beeswax 1x Hemp rope |
5 |
+1 per candle |
| Candle 2 | 2x Fat 2x Beeswax 3x White paint |
5 |
+1.5 per candle |
| Candle 3 | 4x Beeswax 1x Hemp rope 3x White paint |
6 |
+2 per candle |
| Incense | 1x Freshener | 5 |
+2 for 3, +3 for 5 incense |
| Balm Liquid (blue) | 1x Alkali 12x Water 1x Glass cone |
- | Alkali not obtainable. |
| Balm Liquid (yellow) | 1x Acid 12x Water 1x Glass cone |
- |
Alchemy Rack[ | ]

The alchemy rack like other decorative storage changes appearance as it gets more full.
Alchemy themed decorative storage structure. Like the trunk, items stored within the alchemy rack will be automatically available when in the same region.
| Icon | Description | Ingredients | Recipe Source |
|---|---|---|---|
| Decorative Storage. | 8x Flitch
4x Simple Iron Parts 12x Nails |
Writing Supplies |
Desk[ | ]
| Icon | Description | Ingredients | Recipe Source |
|---|---|---|---|
| A place to write. | 8x Flitch
8x Nails |
Writing |
| Item Produced | Materials Required | Energy | Notes |
|---|---|---|---|
| Paper Glop | - | 5 |
Bugged |
| Notes | 1x Story
1x Pen and ink 2x Clean Paper |
30 |
Multiple quality levels |
| Chapter | 3x Notes | 20 |
Multiple quality levels, Can trick the system with the same note in all 3 slots. |
| Book_hard | 1x Soft Cover
1x Chapter |
5 |
Multiple quality levels |
| Book 5x | 1x Pen and Ink
1x Clean Paper |
20 |
|
| Story | 1x Pen and ink
1x Clean Paper 3x Faith |
50 |
Multiple quality levels |
| Prayer (various) | Bugged shows internal names and likely subject to change |
Desk II[ | ]
same recipes as above, without the Paper Glop
| Icon | Description | Ingredients | Recipe Source |
|---|---|---|---|
| Used to write. | 6x Planks
12x Nails 1x Lens |
Writer Inspiration |
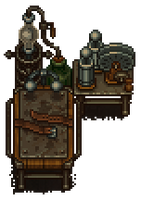
Scrollshelf[ | ]

The scrollshelf left and bookshelf right.
Version 0.674: Storage
| Icon | Description | Ingredients | Recipe Source |
|---|---|---|---|
| General storage chest for up to 25 items. | 8x Flitch
4x Simple Iron Parts 12x Nails |
Writing Supplies |
Bookshelf[ | ]
Version 0.674: Storage
| Icon | Description | Ingredients | Recipe Source |
|---|---|---|---|
| General storage chest for up to 25 items. | 8x Flitch
4x Simple Iron Parts 12x Nails |
Writing Supplies |
Printing Press[ | ]
| Icon | Description | Ingredients | Recipe Source |
|---|---|---|---|
| Used to print the same thing many times. | x6 Wooden Planks
x4 Simple Iron Parts x12 Nails |
A Simple Printing Press |
| Item Produced | Materials Required | Energy | Notes |
|---|---|---|---|
| flyer 10x | Ink, Clean paper 2x | 10 energy |
Note:Can't be worked on to complete project.
Printing Press II[ | ]
| Icon | Description | Ingredients | Recipe Source |
|---|---|---|---|
| Used to print the same thing many times and better than before. | 10x Wooden Planks
4x Complex Iron Parts 18x Nails |
Complex Printing Press |
Note:Contains no Recipes.
Garden (Orchard)[ | ]
This is where trees and shrubs can be planted. Not to be confused with the kitchen garden.
Place for the berry bush[ | ]
Plant a berry bush, berry bush seedlings can be bought from Clotho.
| Icon | Description | Ingredients | Recipe Source |
|---|---|---|---|
| Plant a berry bush in your garden. | 1x Bush Berry Seedling
3x Peat 1x Sticks |
Transplanting |
Place for the apple tree[ | ]
Plant an apple tree, apple seedlings can be bought from Clotho.
| Icon | Description | Ingredients | Recipe Source |
|---|---|---|---|
| Plant an apple tree in your garden. | 1x Tree apple seedling
3x Peat 1x Sticks |
Transplanting |
Kitchen Garden[ | ]
Trunk[ | ]
Used as general storage items inside of a trunk will be accessible from any crafting station in the same region.
| Icon | Description | Ingredients | Recipe Source |
|---|---|---|---|
| General storage chest. | 8x Flitch
8x Nails 2x Simple Iron Parts |
Improvement |
Empty garden bed[ | ]
| Icon | Description | Ingredients | Recipe Source |
|---|---|---|---|
| Used to plant crops. | None | Garden Beds |
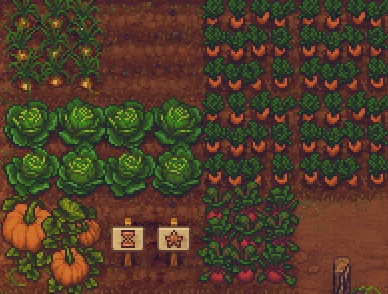

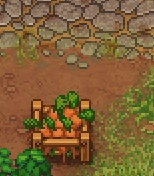
A section of the garden showing several of the crops that can be grown and an empty fertilized garden bed.
Fertilizing a garden bed will place signs which make it untraversable from the north and south directions, but still pathable from the west and east.
| Item Produced | Materials Required | Energy | Notes |
|---|---|---|---|
| Pumpkin | 4x Pumpkin Seed | 0 |
Purchased from the Farmer. |
| Onion | 4x Onion Seed | 0 |
Purchased from the Farmer. |
| Beet | 4x Beet Seed | 0 |
Purchased from the Farmer. |
| Cabbage | 4x Cabbage Seed | 0 |
Purchased from the Farmer. |
| Carrot | 4x Carrot Seed | 0 |
Purchased from the Farmer. |
| Wheat | 4x Wheat Seed | 0 |
Purchased from the Farmer. |
Seeds of different qualities cannot be used together to plant a single garden bed.
Garden bed with sticks[ | ]
| Icon | Description | Ingredients | Recipe Source |
|---|---|---|---|
| Used to plant crops that require support. | 5x Sticks | Improvement |
Unlike garden beds garden beds with sticks cannot be walked through. It is important to be careful when building them as they can trap you or make pathing through the garden to certain plots impossible.
| Item Produced | Materials Required | Energy | Notes |
|---|---|---|---|
| Lentils | 4x Lentil Seeds | 0 |
Purchased from the Farmer. |
Seeds of different qualities cannot be used together to plant a single garden bed.
Vineyard[ | ]
Vineyard Workbench[ | ]
Starts destroyed and must be repaired to use the buildable area in the Vineyard.
Trellis[ | ]
| Icon | Description | Ingredients | Recipe Source |
|---|---|---|---|
| Used to plant in the Vineyard. | 5x Sticks | Grape Farming |
| Item Produced | Materials Required | Energy | Notes |
|---|---|---|---|
| Grapes | 4x Grape Seeds | 0 |
Purchased from the Merchant |
| Hops | 4x Hop Seeds | 0 |
Purchased from the Merchant |
Bee Garden[ | ]
Beekeeper Workbench[ | ]
Used to create beehives. 7 spots are available. Cannot be repaired until 'The Domestication of Bees' has been researched. The workbench has the area labeled as Repair in it's menu.
Bee hive[ | ]
| Icon | Description | Ingredients | Recipe Source |
|---|---|---|---|
| A small Hive box. | 4x Flitch
6x Nails 10x Bees |
The Domestication of Bees |
It takes 5 energy to harvest honey, honeycombs and bees from the hive compared to the 10 energy for wild hives.
Cellar[ | ]
Blueprint desk[ | ]
Used to build structures
Trunk[ | ]
Used as general storage items inside of a trunk will be accessible from any crafting station in the same region.
| Icon | Description | Ingredients | Recipe Source |
|---|---|---|---|
| General storage chest. | 8x Flitch
8x Nails 2x Simple Iron Parts |
Improvement |
Vine Press[ | ]
| Icon | Description | Ingredients | Recipe Source |
|---|---|---|---|
| Presses fruit into juice for fermentation into wine. | 12x Flitch
4x Complex Iron Parts 10x Pieces of Stone |
Winemakeing |
NOTE: This table is correct. The recipes are wrong.
| Item Produced | Materials Required | Energy | Notes |
|---|---|---|---|
| Bucket of juice | 10x Apple | 5 |
Needs fermentation in the barrel |
| Pail of apple juice | 25x Berry | 5 |
Needs fermentation in the barrel |
| Pail of berry juice | 15x Grapes | 5 |
Needs fermentation in the barrel. Multiple quality levels. |
| 2x Seed oil | 4x Bronze-rated hemp | 5 |
Flask, not oil item. No quality levels implemented (yet?) |
Brewing Stand[ | ]
| Icon | Description | Ingredients | Recipe Source |
|---|---|---|---|
| A container for fermenting and crudely distilling mash into Wort. | 24x Pieces of Stone
4x Simple Iron Parts |
Brewing |
| Item Produced | Materials Required | Energy | Notes |
|---|---|---|---|
| Wort | 3x Bucket of clear water
20x Bronze-rated hops 5x wheat |
- | No quality levels implemented (yet?) |
Note: use the bucket of wort to obtain beer x5. Each restores 10hp and 15 energy.
Winemaking barrel[ | ]
| Icon | Description | Ingredients | Recipe Source |
|---|---|---|---|
| A barrel for fermenting wine. | 12x Flitch
5x Iron Parts 7x Nails |
Winemakeing |
Yield: 20 bottles of wine.
Silver grape juice >> Silver wine: Restores 35 HP + 100 energy
Church[ | ]
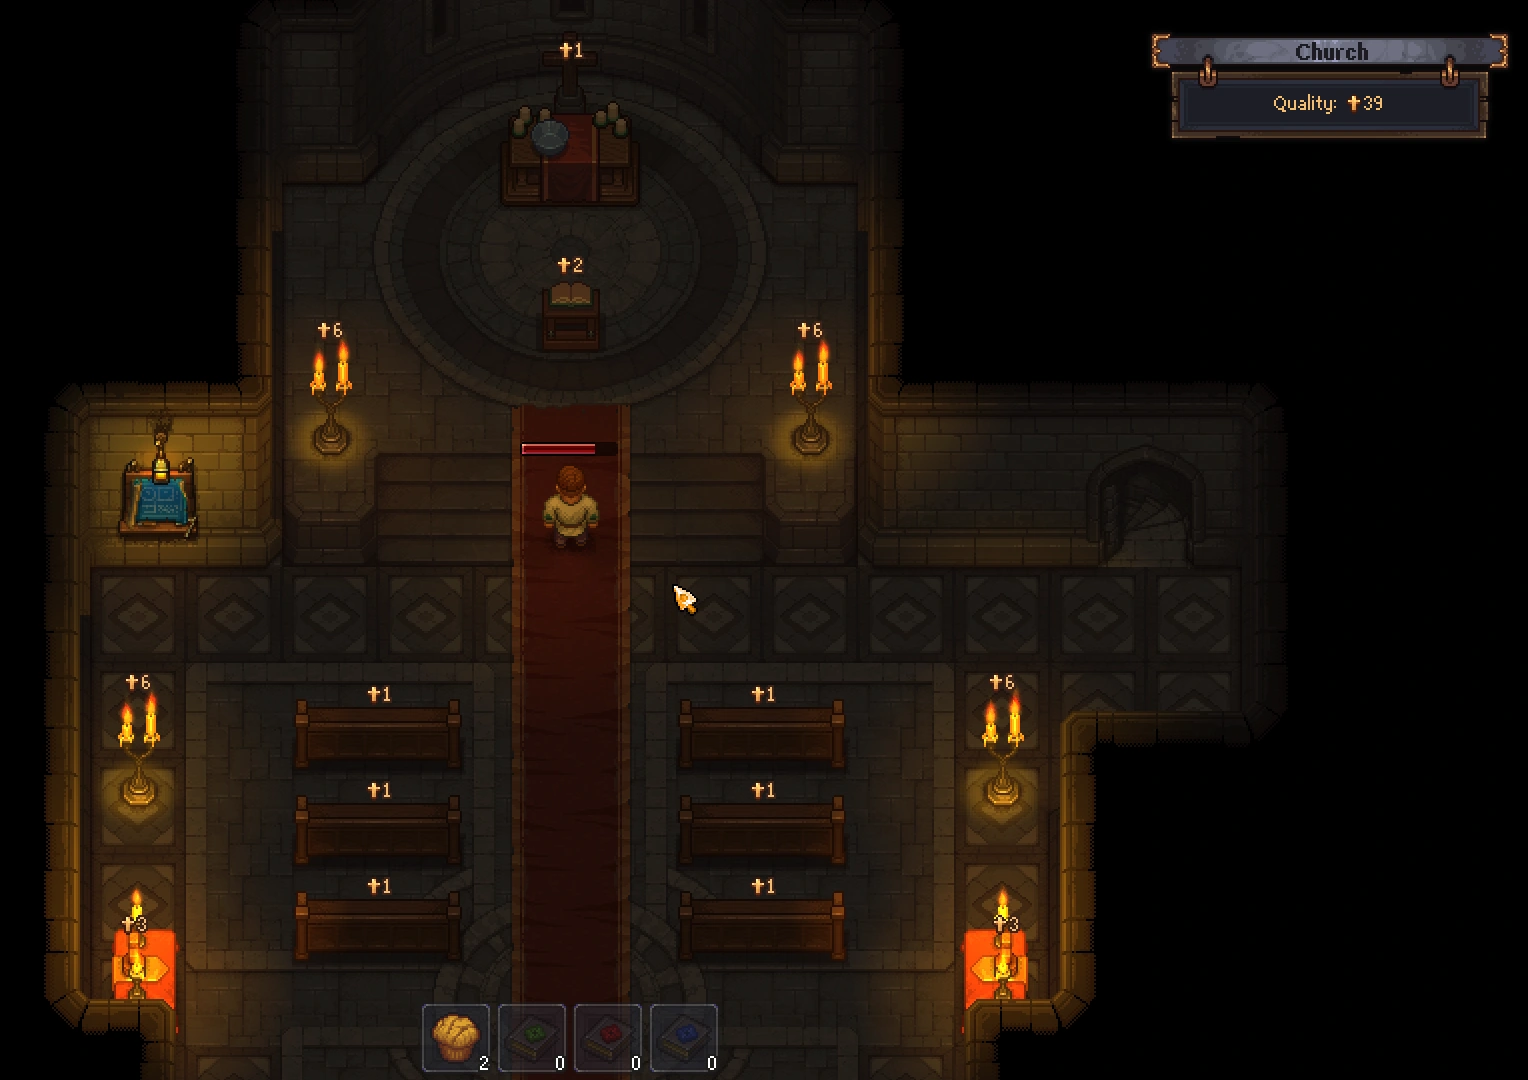

A small church with the candles lit in preparation for a sermon.
Wooden Church Shrine[ | ]
| Icon | Description | Ingredients | Recipe Source |
|---|---|---|---|
| A small wooden shrine. | 4x Wooden Beams
4x Wooden Planks 4x Simple Iron Parts |
Power of Faith |
Increases church rating by 5 ![]() .
.
On event gives 1![]() Faith and 1 Copper Story
Faith and 1 Copper Story
Candelabra I[ | ]
| Icon | Description | Ingredients | Recipe Source |
|---|---|---|---|
| A small iron candle holder. | 6x Simple Iron Parts | Light of Faith |
Increases church rating by 1 ![]() . Burning a candle will increase the bonus for a day.
. Burning a candle will increase the bonus for a day.
Candelabra II[ | ]
| Icon | Description | Ingredients | Recipe Source |
|---|---|---|---|
| A small holder for two candles. | 4x Simple Iron Parts
4x Complex Iron Parts |
Illumination of Faith |
Increases church rating by 2 ![]() . Burning a 2 candles will increase the bonus for a day.
. Burning a 2 candles will increase the bonus for a day.
Incense burner[ | ]
| Icon | Description | Ingredients | Recipe Source |
|---|---|---|---|
| A small table for burning incense. | 12x Polished brick of stone
4x Simple Iron Parts |
Smell of Faith |
Increases church rating by 1 ![]() . Burn 3 incense to increase the rating for a day.
. Burn 3 incense to increase the rating for a day.
Confessional[ | ]
| Icon | Description | Ingredients | Recipe Source |
|---|---|---|---|

|
A wooden booth for confessing one's sins. | 12x Wooden Planks
4x Complex Iron Parts |
Power of Faith |
Increases church rating by 5 ![]() . Occasional event gives 1 Faith and 1 Story. Can build 2 total in the starting church.
. Occasional event gives 1 Faith and 1 Story. Can build 2 total in the starting church.
Church Bench[ | ]
| Icon | Description | Ingredients | Recipe Source |
|---|---|---|---|
| Uncomfortable pew seating for your congregation. | 6x Wooden Planks
4x Nails |
Comfort of Faith |
Increases church rating by 1 ![]() . Can place 6 total in the starting church.
. Can place 6 total in the starting church.
Other locations & repairable items[ | ]
Clear the path - Northeast of Workyard: 2x Flitch, 2x Complex Iron Parts, 10x WoodWedges
Swamp Bridge - Shortcut to Witch: 6x Flitch, 3x Wooden Plank, 10x Nails
Clear the path - Cellar: 10x wood wedge, 2x wooden plank, 4x simple iron parts
Clear the path - Morgue: Clear path: 10x wood wedge, 2x wooden beam, 4x simple iron parts
Fix Throw Out Corpse: 2x a piece of stone, 8x simple iron parts - Must do this twice, both outside & inside the Morgue
Stone Bridge - west river: 1x wooden plank, 8x flitch, 12x nails, 20 energy
North Hill - forest by the river: 3 Nitroglycerine
Swamp - forest by the river: 3 Nitroglycerine